
产品部规划开发一款智能手表,通过蓝牙连接手机并实现一系列交互功能,因此我进行了一系列蓝牙传输技术调研。本文通过小程序蓝牙向 arduino 传输数据,实现简易版的蓝牙智能手表。
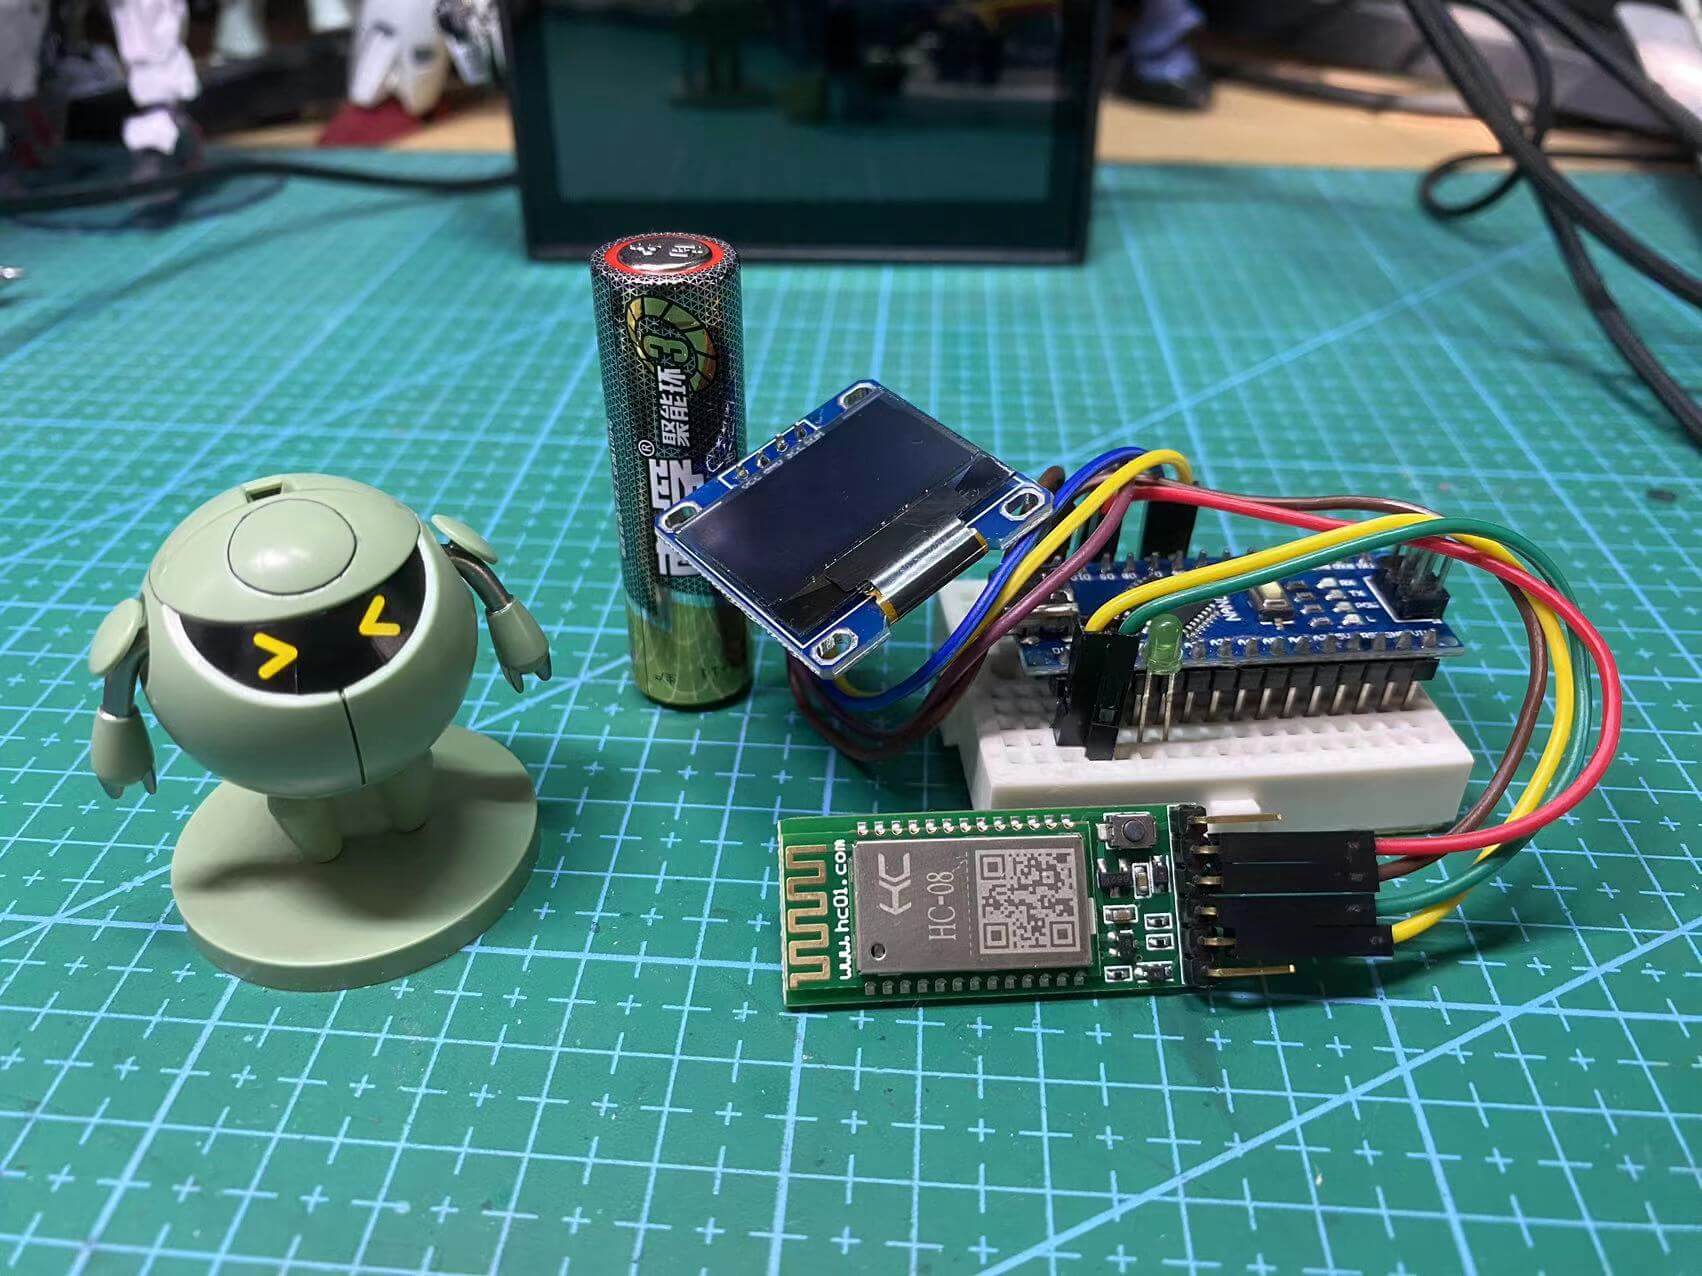
“智能手表” 的硬件配置
- 使用 arduino nano 开发板作为主控。
- 使用 0.96 寸 oled 屏幕作为手表的显示屏,用于显示从小程序传输的数据。
- 使用 HC-08 蓝牙低功耗模块进行蓝牙传输。
- 面包板、杜邦线等连接线材,本文省略接线过程。
烧写 arduino 控制代码
arduino 烧写代码是通过 usb 接口连接到电脑,使用 arduino IDE 进行代码上传。
ardunio 的控制代码使用 c 语言,在本项目中需要引入 Adafruit_GFX 和 Adafruit_SSD1306 库,这两个库用于驱动 oled 屏幕显示,需要在 IDE 中安装这两个库并引入;而 Wire 库可以让Arduino与IIC设备进行通信,这块 0.96 寸的 oled 屏幕使用的就是 IIC 通讯协议,这个库是内置库,直接引入即可。对于蓝牙模块,不需要额外的驱动程序,因为蓝牙模块只需要把数据通过串口传输到 arduino,对串口数据进行监听即可。
代码及相关注释如下:
// 引入IIC通讯所需的Wire库文件
#include <Wire.h>

// 引入驱动OLED0.96所需的库
#include <Adafruit_GFX.h>
#include <Adafruit_SSD1306.h>

#define SCREEN_WIDTH 128 // 设置OLED宽度,单位:像素
#define SCREEN_HEIGHT 64 // 设置OLED高度,单位:像素

// 自定义重置引脚
#define OLED_RESET 4

Adafruit_SSD1306 display(SCREEN_WIDTH, SCREEN_HEIGHT, &Wire, OLED_RESET);
char data = 0;

void setup()
{
  // 初始化OLED并设置其IIC地址为 0x3C
  display.begin(SSD1306_SWITCHCAPVCC, 0x3C);
  Serial.begin(9600);
}

void loop()
{
  words_display();
  display.display();
}

void words_display()
{
  if(Serial.available() > 0) { // 串口有数据则开始读取
    display.clearDisplay(); // 清除屏幕
    display.setTextColor(WHITE); // 设置字体颜色
    display.setTextSize(2); // 设置字体大小
    display.setCursor(0, 0); // 设置光标位置
    String tmp = ""; // 临时字符串变量,保存串口接收到的数据
    while(Serial.available() > 0) {
      data = Serial.read();
      tmp+=data;
      delay(15); // 解决字符串丢失问题
    }
    Serial.print(tmp); // 向串口回复数据
    display.print(tmp); // 在显示屏显示数据
  }
}
使用小程序进行蓝牙通讯
根据小程序官方文档,小程序对 BLE(蓝牙低功耗)支持度比较高,也符合“智能手表”的数据交互使用场景,因此以小程序作为蓝牙通讯的测试平台。
首先安装小程序开发者工具,创建一个 typescript 项目,并手动接入 vue-mini 库,这个库可以把 vue3 响应式能力应用在原生小程序开发中,在工作中也有应用。
以下是蓝牙通讯小程序所需 ts 代码:
import { definePage, reactive } from '@vue-mini/wechat'
import { str2Ascii } from '@/utils/common'
import { formatTime } from '@/utils/util'

definePage({
  setup() {
    const state = reactive({
      input: '',
      deviceId: '',
      serviceId: '',
      characteristicId: '',
      interval: 0
    })

    // ArrayBuffer 转换为字符串
    function ab2str(buf: ArrayBuffer) {
      return String.fromCharCode.apply(null, new Uint8Array(buf) as unknown as number[]);
    }

    async function init() {
      // 开启蓝牙适配器
      await wx.openBluetoothAdapter({
        mode: 'central'
      }).then(res => {
        console.log('openBluetoothAdapter', res)
      }).catch(err => {
        console.log('openBluetoothAdapter err', err)
      })

      // 开始扫描蓝牙设备
      await wx.startBluetoothDevicesDiscovery({
        interval: 1000,
      }).then(res => {
        console.log('startBluetoothDevicesDiscovery', res)
      }).catch(err => {
        console.log('startBluetoothDevicesDiscovery err', err)
      })
    }

    // 找到 HC-08 蓝牙模块
    wx.onBluetoothDeviceFound(res => {
      res.devices.forEach(divice => {
        if(divice.name === 'HC-08') {
          console.log('onBluetoothDeviceFound', res)
          console.log('this is hc-08 ', divice)
          wx.stopBluetoothDevicesDiscovery()
          state.deviceId = divice.deviceId
          connect(divice.deviceId)
        }
      })
    })

    // 建立连接,获取 3 个重要的id
    async function connect(deviceId: string) {
      await wx.createBLEConnection({ deviceId })
      const { services } = await wx.getBLEDeviceServices({ deviceId })
      console.log('services', services)
      const targetService = services[services.length - 1]
      console.log('targetService', targetService)
      const serviceId = targetService.uuid
      state.serviceId = serviceId
      const { characteristics } = await wx.getBLEDeviceCharacteristics({ deviceId, serviceId })
      console.log('characteristics', characteristics)
      const characteristic = characteristics[0]
      state.characteristicId = characteristic.uuid
      if(characteristic.properties.write) {
        if (characteristic.properties.notify || characteristic.properties.indicate) {
          // 必须先启用 wx.notifyBLECharacteristicValueChange 才能监听到设备 onBLECharacteristicValueChange 事件
          wx.notifyBLECharacteristicValueChange({
            deviceId,
            serviceId,
            characteristicId: characteristic.uuid,
            state: true,
          })
        }
        wx.writeBLECharacteristicValue({
          deviceId,
          serviceId,
          characteristicId: characteristic.uuid,
          value: str2Ascii('hello world'), // 向蓝牙串口写入 hello world
        })
        wx.showToast({
          title: '初始化成功',
          icon: 'success',
          duration: 1000
        })
      }
    }

    // 监听串口返回的数据,可以收到回复的 hello world
    wx.onBLECharacteristicValueChange((result) => {
      console.log('result', result, ab2hex(result.value))
      console.log('str', ab2str(result.value))
    })

    function onInput(e: WechatMiniprogram.CustomEvent) {
      state.input = e.detail.value
    }

    // 发送字符串
    async function onSubmit() {
      console.log(state.input)
      await wx.writeBLECharacteristicValue({
        deviceId: state.deviceId,
        serviceId: state.serviceId,
        characteristicId: state.characteristicId,
        value: str2Ascii(state.input)
      })
      wx.showToast({
        title: '发送成功',
        icon: 'success',
        duration: 1000
      })
    }

    // 实现“手表”显示时间
    async function showTime() {
      state.interval = setInterval(() => {
        const time = formatTime(new Date())
        wx.writeBLECharacteristicValue({
          deviceId: state.deviceId,
          serviceId: state.serviceId,
          characteristicId: state.characteristicId,
          value: str2Ascii(time)
        })
      }, 1000)
    }

    function stopTime() {
      clearInterval(state.interval)
    }

    init()
    return {
      state,
      onSubmit,
      onInput,
      showTime,
      stopTime
    }
  },
})
以下是 wxml 部分
<view class="page">
  <view>请输入</view>
  <view class="input-wrap">
    <input type="text" class="input" value="{{state.input}}" bind:input="onInput"></input>
  </view>
  <button type="primary" bindtap="onSubmit">上传</button>
  <button bindtap="showTime">显示时间</button>
  <button bindtap="stopTime">stop</button>
</view>
“智能手表” 最终效果
正确连接线路(arduino、蓝牙模块、oled 模块),并给 arduino 模块通电启动。此时蓝牙模块将进入待机状态,等待连接。
打开小程序,小程序将会自动连接到 HC-08 蓝牙模块,连接成功后小程序将会有
初始化成功提示。此时 oled 屏幕上显示hello world。在小程序输入框中输入任意文字(仅限 ASCII 码),点击上传按钮,即可在 oled 屏幕上显示对应的文字。
点击“显示时间”按钮,小程序将会每隔 1s 发送当前时间到 arduino,在 oled 屏幕上将会显示每秒变化的时间。
Q&A
- 为什么只能传输 ASCII 码,可以传输中文吗?
受限于 arduino 储存空间(32KB),默认只能显示 ASCII 码。对部分中文字体进行编码,可以实现有限的中文显示。还可以使用自带字体库的屏幕模块。
- 为什么传输的是 ArrayBuffer?
蓝牙传输和 oled 屏数据传输都是采用串口通讯,串口通信的数据传输都是0和1,只能传输二进制数据。对于 ASCII 码,一个字符占用1bit,因此对应 js 中的数据结构是Uint8Array。